The Walls of Record
How You can also search for the hidden Ancient Images
and discover their secrets - A Layman's Guide
INITIAL NOTES
We discovered elaborate mages on very ancient surfaces that are barely visible if ever to the naked eye. Our purpose in this article is to share the method which led us to them so that others wherever they are, can duplicate and add to the results themselves. I shall waste little time quantifying the results of our photo-archaeological research here, as it is presented in abundance in our other files. Later in this presentation however I will take time to describe the image effects that you will encounter.
We are of no doubt there is far more advanced photo-analysis software and camera equipment than what we have used. But from a modest base we still achieved result which you can duplicate.
It will be necessary within this presentation to use an example picture to display the stages of analysis as they are explained. I noticed a picture in Judith’s collection, taken a few days ago when she visited Meadowcroft Rockshelter - which was one of the first archaeological sites in the United States to contain evidence of pre-Clovis populations. http://en.wikipedia.org/wiki/Meadowcroft_Rockshelter
Judith captured a lot of rock surface pictures for analysis, and I await them now. In the meantime I saw one general picture displaying a stone cistern or trough on the grass. I did some analysis on the pic. It appeared the trough had in part or completely been plastered at one time. I also noticed familiar faint delineations surviving on the surface. Although not from NC2 or Egypt, I thought this would be an ideal neutral candidate for live analysis as a part of this presentation.
WHY CAN’T THEY BE SEEN WITH THE NAKED EYE?
A basic question is to ask why the images cannot be seen with the naked eye.
We accept these images were created many thousands of years ago in ancient times. Above ground, surfaces are exposed to the elements and there would be slim chance of decent examples surviving.
Underground they are protected from the open elements, but could have suffered from numerous other attacks such as from the following: Water flow & erosion: Rock salt deposits: Bat Guano: Build-up of grime and dust: Deliberate or incidental cultural vandalism; Wear and tear from occupational use.
It is worth adding that fading images of an ancient civilization would have had less aesthetic importance to later people than the sacredness of the site. Thus logically, later people would have had no scruples about painting their own less sophisticated images over the fading original images. It is as we have found so often that traces of older complex images can be delineated under later (ancient) images.
Above or below ground the images would have suffered also from natural degradation in exposure to the air. Finally, the rock surfaces have an overpowering pervading colour of their own. This blinds the eye to anything painted - etched or drawn on the surface, especially if faded. These same conditions would affect target sites anywhere in the world.
OUR EQUIPMENT
Simplicity itself!
I use a 12.5 mega pixel Canon Digital Camera, which gives an image dimension of 3648 x 2736
I do initial analysis using Microsoft Office 2010 software
And for live delineation with the mouse I use Adobe Photoshop Elements 9
THE APPROACH
I have one advantage which is impossible to pass on to others directly. It is that I have spent hours to days to weeks and months of time becoming used to the analysis procedure. I have therefore developed an eye to be able to see almost instantly if a suitable rock surface may have surface anomalies worth investigating. However my experience enables me now to be exact about the how others should approach the process.
THE SAFEGUARDS
The first concern is to know when we are seeing simulacrum http://en.wikipedia.org/wiki/Simulacrum
or Hyperreal images http://en.wikipedia.org/wiki/Hyperreality Our mind tends to connect the dots and see what may not be there; but being aware of the process makes it much easier to reject a false image – provided you have other safeguards in place. Several items in fact have been reported as simulacrum from the NC2 pics, but closer examination on successive trips has confirmed these have been actual rock carvings or reliefs.
For me I reject a possible image if it does not have other clear image validations in the same frame and context.
I reject an image if it or others in the frame or group do not have infallible features. This means detail somewhere that I cannot reject and which is accurate to the form or biological shape of an animal, humanoid, building or device.
The image always has to answer a basic question: Does this have clear markings or delineating lines which would not appear in nature? I can tell you from the outset that apart from the other clues to the presence of hidden images you must know this: The images are not 2 dimensional. They often use the structure of the rock surface to enhance their shape. They are 3 dimensional and occupy depths of perspective. Coupled with all the other reasons for their degradation, this is another clear reason why the images are hard to see in plain sight. It is therefore absolutely necessary for any researcher to stop just seeing the flat surface of the rock.
The eyes have to become passively defocused and trained to see into the rock. If there is something there to be noticed, the eyes will latch on to it. As soon as the brain seizes the right focal depth, then anything belonging to that depth and perspective suddenly comes to life like a magic picture. In later stages of the analysis the process of eye/brain coordination towards the correct focal depth, is paramount.
Ideally the original picture has consistent brightness and no light glow. We have found that an ideal picture of a surface would be taken from a very slightly acute angle, at a distance of a few feet and with the camera set at Highest Definition. Ideally the area would be evenly lit with softened light; but if with a flash only, then at an angle or distance so that there is no flash-back of light. Nearly all of our studies so far have been incidental from general pictures. It is not usual for people to spend time taking pictures of apparent blank rock surfaces!
THE DOING OF IT
The easiest way to describe the basic process is to take you through the study sample I described at the start.
Create a New Picture File and Paste a copy of the target pic in the new folder (named to the pic)
Then at every crop stage always (Save As) from the Menu bar:(File.)
I always give the saved study pics an ID. name and a sequential identifying number.
Open the potential picturein Office 2010, where the Menu: PICTURE/ Brightness and contrast – are selected.
Microsoft Office 2010 has a fail-safe because…
from the Menu you can select Edit/Discard Changes and click/reverse any change/s you make.
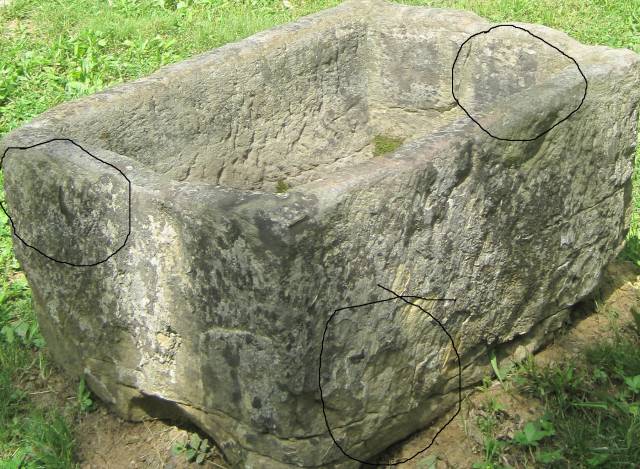
Here is the sample study picture from the Meadowcroft Rockshelter
The second one shows any irrelevant background cropped via Menu: PICTURE / CROP
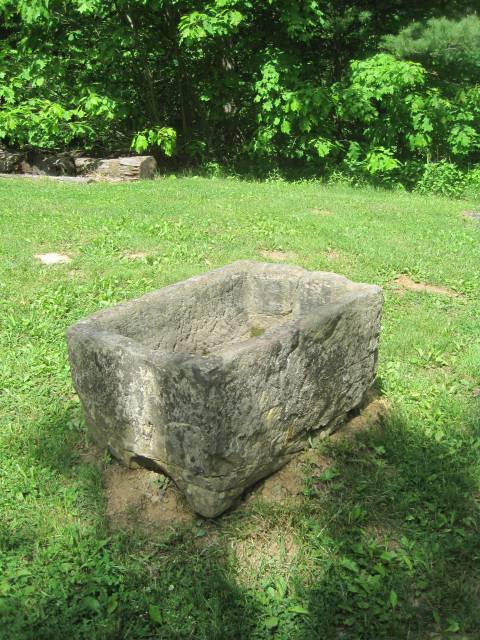
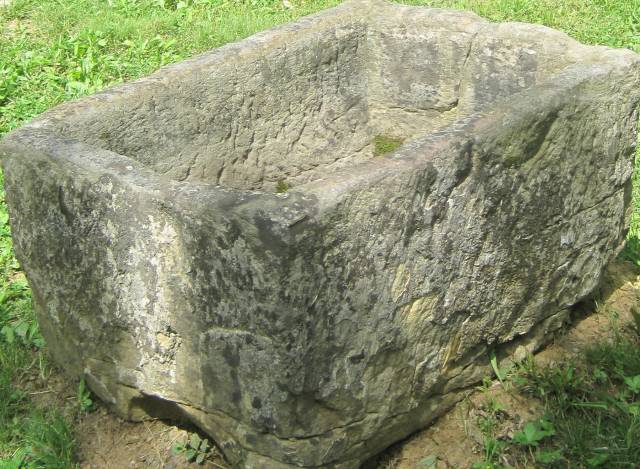
I look for anything obvious, such as the different shadings. This will mean in this sample if I find anything on the surfaces, I will have to crop each area as a separate picture and then edit the brightness separately for each cropped frame. Remember at each crop stage zoom the picture out to fill the screen for examination.
I use the zoom slider on the foot menu to discover at what depth the picture begins to lose focus.
I then pull back a little from that critical point.
I determined the safety distance is at about 180% zoom on this pic.
I give the pic a general inspection using my mouse/scroll.
Here, it is clear to distinguish deteriorating plaster on the outer surface, and at the nearest bottom corner there is enough of a hint of unnatural lines appearing on the bare surface for the whole image to get my proper attention.
I detect images immediately and I see they are lined in a row.
Their style is generic to the images we have been finding.
So, without even looking at the rest of the surfaces properly yet, I proceeded to do a crop to the first target area:
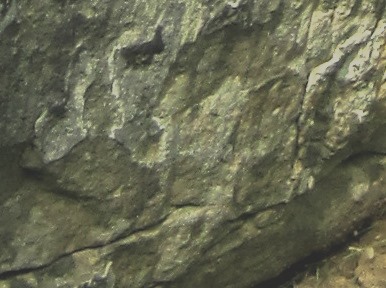
Now I can turn to the adjustment features of Office 2010 to enhance the image.
From the Menu: PICTURE/ Brightness and contrast…
..we get an adjustment option for Brightness //Contrast// Midtone// Highlight and Shadow.
For this pic I increased Brightness 10% : Contrast 86% : Midtone 10% : Shadow 8%
This was the result:
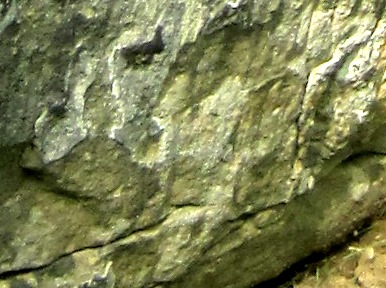
Now I am ready to adjust the colour frequency from Menu bar: PICTURE/Colour….
which gives options for the Amount/ The Hue and the Saturation…
I always set the Amount slider fully left to (-100%)
This produces the adjusted pic shown below.
Before doing anything else I check the picture to identify the strongest potential images I can detect.
I have circled two areas on the pic for you to see.
The upper circle seems to be one or two figures facing left and the lower one is a clear python snake figure. I can see other images but I will try to get the next adjustments as perfect as I can to focus on the strong targeted areas.
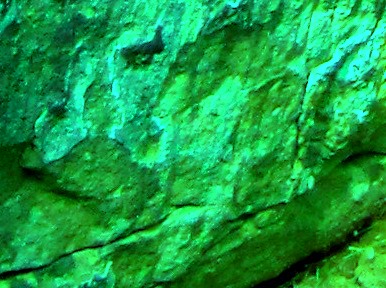
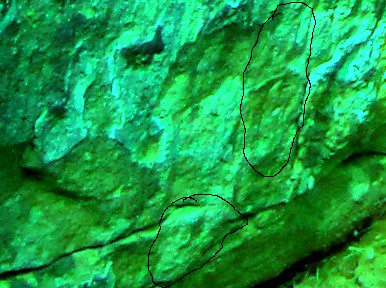
At this stage the cropped target pic is blinded by the Green frequency.
This is already counteracting the original colour of the stone surface.
Each change of colour frequency may draw-out any hidden images.
The skill is now to place your mouse pointer over the Hue slider ..and with the mouse roll-bar… move the slider back and forth through the colour spectrum.
You will find there is an ideal point for every sample where the image is sharpest , and especially where there is least colour-glow. When you try this you will see exactly what I mean. There is no harm to do here… You can try for as long as you wish through the colour range to find the optimum colour position.
For me I found the best position was a Hue setting of (56)
Very often while going through this process I also use the zoom slider to dive in and out from the frame to check detail. The next 2 pics display the Hue setting just described.
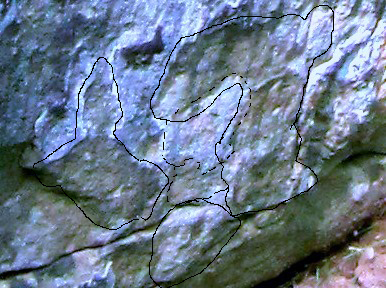
Already this has begun to delineate some of the other images I mentioned. They are circled in the 2nd pic and I know I will be able to sort these out later and after a few more adjustments.
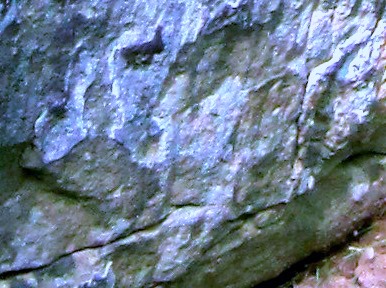
I continue now with the Saturation adjustment.
Very often a pic will benefit from the colour saturation being cut back almost to black and white, or the opposite.
Again it is a matter of judgement, but for me I ended up with Saturation set at (60)… giving the next pic.
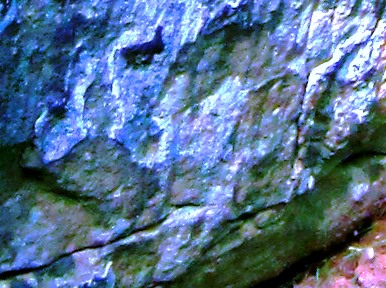
Next stage is to go to the Menu and select Picture/Brightness and contrast again.
Now these final adjustments are critical, but very much a matter of judgement and practice.
You will find you are able to trade-off adjustments against each other.
For example :
More Contrast darkens, so has to be played together with the Brightness.
But this can lose definition and theMidtone has to be balanced/deepened against the Brightness
However if the shape delineations seem blurred then Shadow can deepened.
But deepened Shadow will lose you the already darker parts of the pic unless played back against Brightness.
If in the process parts of the image begin to glow, then the Highlight can be deepened
But the Highlight is most likely to destroy the definition and has to be used very wisely.
I ended up with the following settings:
Brightness (10) Contrast (24) Midtone (-19) Highlight (-33) Shadow (-28)
At any stage it is possible to use from Menu: the Edit/ Undo or Discard to reverse one move or all moves and begin again from another aspect. Sometimes I begin with colour adjustment, or return back and forth between the two.
Any time the scope of a Brightness/Contrast adjustment reaches its limit and you would like to take it further, stop and switch to Colour adjustment. Make a tiny colour adjustment and return to B/C adjustment – and you will find the sliders have returned to default positions for full extra adjustment.
When I am satisfied I have done all that I can to the frame, I begin a final studious inspection of it at various zoom depths. (Remember we began with the first crop set short of focal distortion, so there is now a margin to zoom further without blurring.)
When I am satisfied the frame has yielded sufficiently sharp images I have a couple of options for their presentation.
I can:
(1) Save the result and then open it again in Elements 9 where I can use the mouse to shakily draw around
the outlines of the images seen. This produces a quick but far less accurate result.
(2) Or I can obtain an A3 high quality matt colour print of the frame. From this I can use a Pilot BPS-GP fine
felt tip pen to delineate the images by hand…. BUT… when doing it this ultimate way I had to adopt
another vital safeguard.
It would be so easy freehand with a pen to follow shapes that the brain and eye were trying to force on me. So I turn the picture upside down to work on. My only brief is to delineate the line of every clear difference of colour or shade across the whole print. If the difference is small, the line must be done as a broken delineation. The process is very painstaking. However when done and the picture is rotated to its correct direction, the result completely blows the mind when a complex exotic 3D panoramic picture is revealed!
For the study used here, I took the last frame shown above and used the Elements 9 method. Bear in mind, the analysis process we have covered has been in connection with one small corner of the original target picture. The whole process has to be repeated with every part of the target picture.
So the next picture shows the (Elements 9) partly delineated study from above.
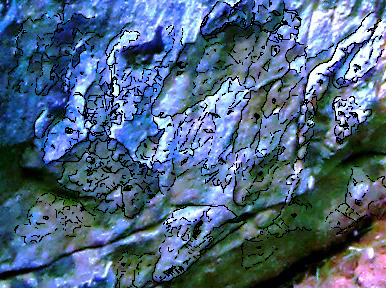
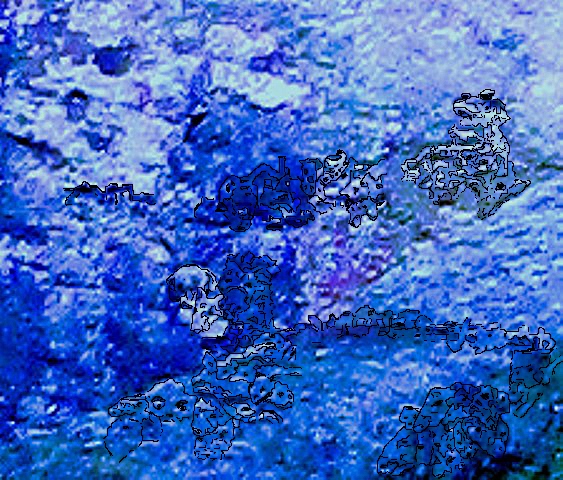
The second pictures show (before and after) - a second worked example from another part of the trough/cistern
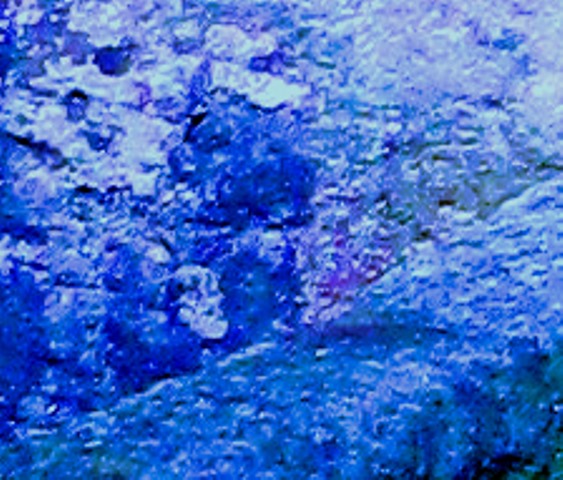
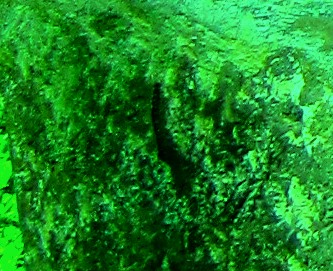
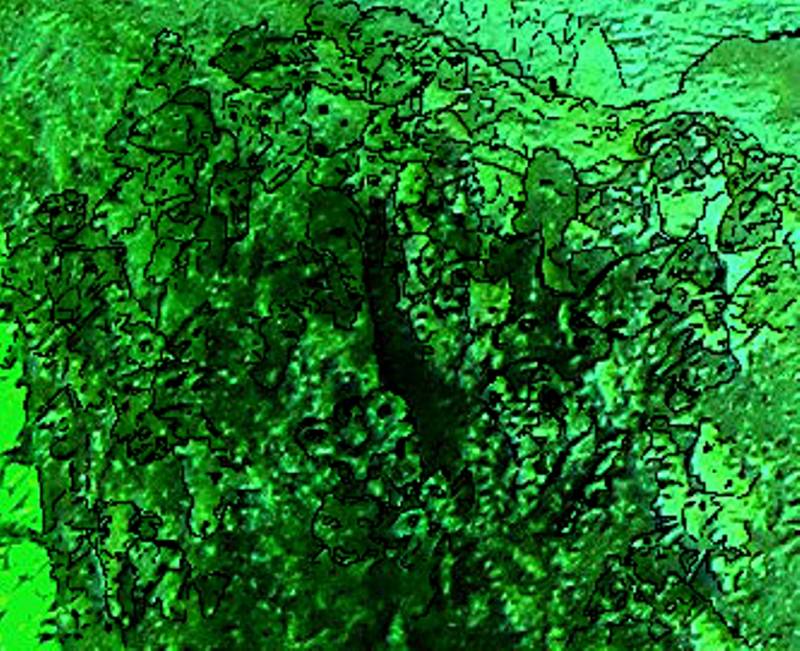
The third pictures show (before and after) – from a third area of the trough/cistern.
This one is a really good example of the fractal imaging I spoke of in the earlier explanations. The small images even form tree shapes in a jungle scene. Many more studies could be done from the original picture. It is not the best example I have ever found, but I hope it has been good enough to illustrate the process. In NC2, some creatures and frescos are huge - filling whole walls. Here then are the last pairings from the trough/cistern. I did not complete the whole study, but if you paste all these pics to your own computer you can (and need) to open them large in order to see the detail properly.
The main study with some basic mouse/Elements 9 delineations
......................................................................
The second sample pair with a start to the deliniation
...............................................................
The Third Sample Pair after more detailed adjustment on Elements 9
A reminder... All from this !!
